How To Install a TV Wall Mount?
Staring at a massive new flat screen in the middle of your sitting room can bring on sudden dread. You are terrified of ruining your fresh plasterwork or dropping the telly. If you are wondering how to install a TV wall mount safely, the secret is simply understanding your wall type.
Fixing your screen correctly involves finding wooden studs, using heavy-duty anchors, and making sure the bracket is level. We will walk through the entire process carefully, from picking tools to hiding dangling cables afterwards. This walkthrough gives you the confidence to tackle the job yourself without causing a disaster.
There is nothing quite like the panic of an unsteady bracket, so doing the prep work properly is completely non-negotiable. A secure fixing clears floor space and gives your room a sleek look. Let’s get straight into the practical details so you can enjoy weekend movie nights without any lingering worry.
Preparing for Your TV Wall Mount Installation Properly
The biggest mistake DIY enthusiasts make is rushing straight for the drill without assessing the sitting room wall. A proper TV wall mount installation requires knowing exactly what is lurking behind the paintwork before making a mark. Hollow plasterboard will not hold a heavy flat screen on its own.
In most modern Irish housing estates, you are dealing with timber studs hidden behind standard plasterboard. You have to locate these wooden uprights because anchoring the metal bracket into wood gives the necessary structural strength. If you miss the studs, the sheer weight will pull the fixings right through the plaster.
Dealing with Solid Block Walls
Older properties across Ireland often feature incredibly sturdy, solid block walls, which are brilliant for hanging heavy things securely. For these hard surfaces, you will need a power drill with a hammer action to break through masonry. Standard wood screws are useless; you need proper masonry wall plugs that expand tightly.
You might also run into dot-and-dab walls, which involve plasterboard glued directly onto the blockwork with a small gap. These can be tricky because standard fixings might snap the delicate plasterboard if tightened too much. You will definitely need extra-long core fixings that bridge that space and bite into the blockwork.
Essential Tools You Will Need Before Starting
There is nothing more frustrating than getting halfway through a DIY job and realising you are missing vital equipment. You inevitably end up balancing awkwardly on a chair, shouting at someone to run to the hardware shop. Gather everything on this comprehensive list before lifting the bracket out of its packaging.
- A reliable power drill, ideally with a hammer action setting if dealing with solid block walls.
- A good quality stud finder to accurately locate hidden wooden battens behind hollow residential plasterboard.
- A long spirit level to ensure your bracket is perfectly straight and you don’t end up crooked.
- A proper tape measure and a sharp pencil for clearly marking out precise drill holes on the paintwork.
- Heavy-duty wall anchors and sturdy screws specifically designed for the exact wall type you currently have.
- A handheld vacuum cleaner to suck up the dust as you drill, saving your sitting room carpet.
- A sturdy stepladder so you can work comfortably at height without balancing on soft dining furniture.
Having these essential tools laid out on the floor makes the afternoon feel much more organised and far less stressful. The spirit level is probably the most crucial item, as guessing alignment purely by eye never ends well. Take a quick trip to the hardware store for better peace of mind.
Step-by-Step Instructions for a Secure Setup
Attaching the physical bracket is the part that usually gives people genuine cold sweats, but breaking it down helps massively. We will carefully look at exactly how to mount a TV on the wall without ruining your sitting room. It genuinely all comes down to slow, deliberate actions and double-checking your measurements.
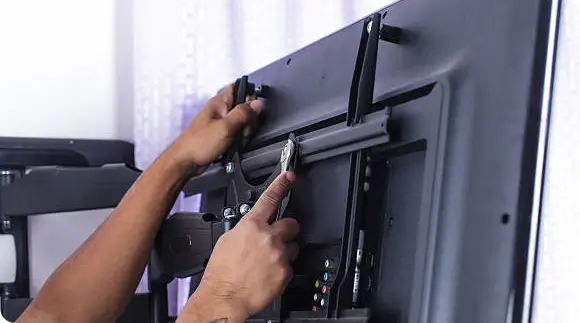
Step 1: Start the entire process by securely attaching the two vertical metal arms directly to the back of your new flat screen. Placing a thick, soft blanket flat on the floor is perfect for protecting the delicate glass from any accidental scratches. Do not aggressively over-tighten these small screws; just make sure they are adequately firm against the plastic casing.
Step 2: With the arms securely screwed onto the back of the telly, it is time to tackle the wall plate itself. This metal plate takes the entire weight of the screen, so you genuinely cannot afford to rush this part. Empty your little bag of screws and rawlplugs onto the carpet nearby so you aren’t constantly rooting through your pockets to find them.
Step 3: Grab that heavy wall bracket and hold it flat against the wall roughly where you want it to sit. Throw your spirit level on top to get it dead straight, and poke your pencil through the open metal slots to clearly mark the paintwork. Take the bracket down and just have a quick look at your pencil marks again to be certain before you start the drill.
Step 4: Drill your pilot holes very carefully straight into the wooden studs or use your heavy masonry bit for the solid blockwork. Tap your chosen rawlplugs in gently with a small hammer until they sit completely flush with the flat plaster surface. Now, firmly hold the bracket back up to the holes and tighten the heavy screws to secure everything tightly against the wall.
Step 5: Lift the heavy screen with the help of a capable friend and gently hook the attached vertical arms directly over the secured wall plate. Make sure both sides are properly engaged and sitting entirely flush against the metal lip before letting go. Tighten the small safety locking screws underneath the bracket immediately to prevent the screen from ever being accidentally knocked off.
Finding the Perfect Viewing Angle and Best Height to Mount a TV
People constantly tie themselves in frustrating knots trying to figure out the best height to mount a TV perfectly. The truth is that there is no strict mathematical rule that perfectly applies to every single house arrangement. It completely depends on the height of your current sofa and your room.
A highly reliable rule of thumb is to have the absolute centre of the glowing screen sitting at eye level. You genuinely do not want to be craning your neck backwards permanently, like you are stuck in the local cinema. This causes terrible neck strain and completely ruins the relaxed viewing experience.
A fantastic trick is to have someone temporarily hold the empty cardboard television box against the wall for you. This gives you a brilliant sense of the visual scale and height without having to hold the heavy screen awkwardly. Look at it from a few different seats to ensure a good view.
Pro Tip Section for a Flawless Finish
If you are opting for a full-motion or cantilever bracket, you must account for the massive amount of extra leverage. When you pull the screen away from the wall, the pulling force on your top wall screws increases dramatically. Because of this, you must hit solid wooden studs or use masonry bolts.
Another highly crucial pro tip is to plug all your HDMI cables and power leads straight into the screen beforehand. Trying to awkwardly squeeze your hand behind a massive flat screen while it is pinned tight against the wall is frustrating. Having the vital wires hanging down and ready makes the setup much easier.
Always remember to physically test the bracket with your own substantial body weight before lifting the expensive screen onto it. Give the metal plate a really hard, sustained tug to ensure there is no loose wobbling whatsoever. If it feels remotely weak, you need to rethink your structural wall fixings completely.
Sorting Out Your Cable Management System
Once the heavy screen is finally hooked up, you will likely notice an ugly bunch of black wires dangling down. The whole point of getting the screen up was neatness, so thoroughly dealing with this messy spaghetti is highly essential. There are loads of brilliant TV wall mounting ideas to hide these cords easily.
- Use simple adhesive plastic trunking from the hardware shop to clip the cables neatly together securely.
- Paint the plastic trunking the same colour as your sitting room wall to blend it seamlessly.
- Run the wires directly through the hollow cavity of a plasterboard wall by carefully cutting small access holes.
- Use cable ties or strong Velcro straps behind the screen to bundle everything tightly together perfectly.
- Place a tall indoor plant or a stylish bookshelf directly underneath the screen to naturally obscure trailing wires.
Taking twenty minutes to sort out the cables properly transforms the entire job from a messy DIY attempt into a professional installation. Even installing basic plastic trunking makes a massive visual difference and positively stops the room from looking cluttered. It is the final aesthetic polish that brings the whole home entertainment setup together.
Frequently Asked Questions
Q. Can I securely mount a heavy flat screen on plasterboard alone?
A. You should never hang a massive screen directly onto hollow plasterboard without completely securing it to the hidden timber studs behind. Standard hollow wall anchors will eventually fail under the constant weight, causing significant plaster damage to your beautiful sitting room wall.
Q. Do I genuinely need a long spirit level for this specific job?
A. Yes, a spirit level is essential to firmly ensure your metal bracket is perfectly horizontal before you start drilling any holes. A slightly crooked wall bracket will slowly drive you entirely mad every time you sit down to relax and watch your favourite television programmes.
Q. How many people do I actually need to complete the installation safely?
A. While you can easily mark and drill the pilot holes on your own, you definitely need two capable adults to lift the heavy screen onto the bracket. Trying to aggressively lift a massive modern television completely alone is a recipe for dropping and smashing the delicate glass.
Q. Should I use the standard wall plugs included in the bracket box?
A. The free wall plugs usually included are often quite basic and might not be structurally suitable for your specific living room wall type. It is always significantly safer to thoughtfully purchase heavy-duty fixings from a hardware store that are specifically tailored to plasterboard or block.
Q. What is the best way to neatly clean up the drill dust?
A. Hold the suction nozzle of a standard handheld vacuum cleaner directly underneath the metal drill bit while you are making the holes. This simple trick catches the vast majority of the grey masonry dust before it ever has a chance to hit your clean carpet.
Conclusion
Getting your new entertainment setup properly secured genuinely transforms the entire feel of your sitting room for the better. It successfully creates a much cleaner look, frees up valuable floor space, and keeps delicate electronics safely away from accidental knocks. Taking your time and carefully using the right fixings is the absolute secret.
However, if the thought of taking a heavy power drill to your pristine plasterwork brings you out in a sweat, you do not have to tackle it alone. Our expert technicians handle these exact frustrating jobs all over Ireland every single day, guaranteeing a secure finish. Get in touch with us through the SMART SAT CONNECT website today, and we will get your screen perfectly sorted without any of the DIY headaches.

